Door Card Builds (Part 1)
Materials & Tools Required:
MDF Sheet
Cotton based fabric (something like good quality T-Shirt material), enough for both doors.
Fibreglass Resin (at least a 1kg tin) & mixing equipment
FibreGlass Filler
Car Body Filler
Hot Glue Gun & Sticks
Staple Gun & Staples
Snub nosed Pliers
Electric Sanders & various grades of sandpaper
Safety Mask & Goggles

The door card in its original state, you will neer to remove all handles, bezels, etc.
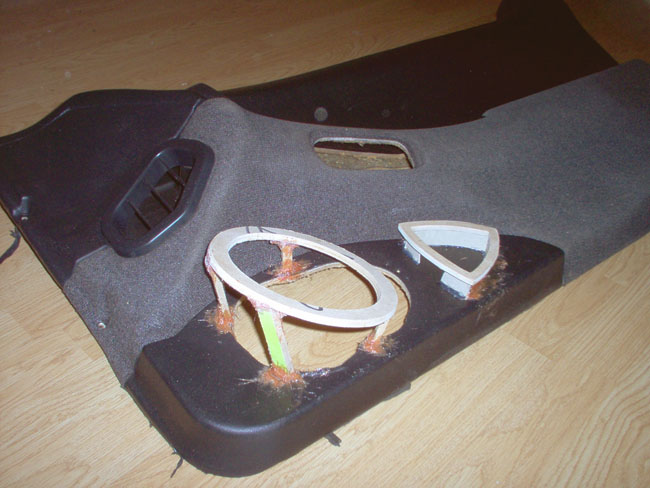

Framework was cut out of MDF, attached at first using a hot glue gun (the triangular shape is for the crossover). Then once everything was in the correct place Fibreglass filler was applied for a more permanent hold.


I then cut my material roughly to shape (slightly larger, as it can be trimmed afterwards). This was then stretched to shape and attached using the staple gun (you can see from the staples in the pics).
Next job is to apply the resin, you will need to do this in a well ventilated area and be wearing a mask. If you have a quick dry catalyst allow at least 45mins before applying 2nd coat (maybe even a 3rd). If you live in the UK and use ebay I can highly recommend 2343nick's shop and website tomps.com for fast, helpful service.

Once this has completely hardened use the pliers to remove the staples. At this point you can also cut out any parts you need to remove, such as the handle hole and speaker area (and in this case where the crossover fits).


Then comes the tedious job of sanding everything down and smoothing to shape using the body filler, this will take many hours.

Try masking and spraying with primer, you may be able notice any blemishes, etc, that need further filling/sanding.

Once this is all done, mask (if you haven't already) and spray the colour you require. I personally wasn't happy with the finish I had afterwards so I took it to a local bodyshop to be sprayed.


Here is the door after being at the bodyshop (see it's always best to let the professionals do it!). It was done by the lads at Devilsride and these pictures really don't do this finish justice. It has high gloss flip-coat colour to it (sort of silver/green), which is going to be the final colour of the car.
posted by Zedman @ 1:41 pm
0 comments
![]()


0 Comments:
Post a Comment
<< Home