PimpZ : The story so far . . . .
An on going project to Pimp My 300zx and install a Mac Mini Carputer system
Tuesday, January 31, 2006
Wednesday, January 11, 2006
Tuesday, January 10, 2006
Door Card Builds (Part 2)
Materials & Tools Required:
17amp Cable
SuperGlue Gel
Lollipop or Waxing Stick
Piping
The final finishing touch is to apply the piping, this helps to to tidy up the edge between the build and the vinyl body.

All that is needed

Carefully apply the superglue gel at 1cm gaps, be careful not to apply too much as we don't want the dried glue to be seen.

Use the lollipop stick to hold the cable in place whilst the glue dries. Use the stick because you do not want to touch this with your fingers, if they come into contact with the glue it dries white. This job takes patience waiting for each contact to dry.

Finally, if this is done right and it hides any sins and neatens things up.

Well here it is, before and after (kinda).
Monday, January 09, 2006
New Bumper : Fitting
To fit the bumper I decided to leave to the pros at the bodyshop, but for those of you interested there is a good detailed run down of how to remove the bumper here.


Well here it is all sprayed up and........ it doesn't freekin' fit!
At least from this pics you get an idea of how it will look, what a difference huh?.
Let this be a lesson to us all, make sure you get bodykit parts from a Z specialist. My bumper doesn't fit (probably created from a mould of a mould), it's slightly smaller & will need cutting to fit.
This has been stressville for me and the boys at Devilsride, So I'm gonna wait until the whole body is sprayed for the cutting/fitting.
New Bumper : Adding Mesh
Materials & Tools Required:
Wire Mesh (available from any good motor parts stockist: I got mine at Motorworld)
FibreGlass Filler
Tin Snips/Metal Cutters
Mallet
Sometime ago I purchased the bumper I wanted installed, it has more agressive styling to it than the original.
Don't get me wrong, I love the style/design of the 300zx (Z32, not the Z31 it looks to much to me like a squared off 280zx) and think it's a crime that it's been overlooked as a supercar; but it just needs to look more like the powerful car it is.

Well, this is what it looked like when it arrived. First thing it needed was to have mesh installed.

Start by cutting the mesh roughly to size and begin shaping gently with the mallet (we don't want to harm the bumper!). Whilst working on this you might want to lay the bumper on some cloth or carpet, so the front doesn't get harmed/scratched.

Next cut and shape further using the metal cutters.


Once completely happy with the shaping start applying fibreglass filler, we want create a permanent fixture. When this is hardened sand off any sharp parts to avoid anyone getting cut when attaching to the car.
Sunday, January 08, 2006
Door Card Builds (Part 1)
Materials & Tools Required:
MDF Sheet
Cotton based fabric (something like good quality T-Shirt material), enough for both doors.
Fibreglass Resin (at least a 1kg tin) & mixing equipment
FibreGlass Filler
Car Body Filler
Hot Glue Gun & Sticks
Staple Gun & Staples
Snub nosed Pliers
Electric Sanders & various grades of sandpaper
Safety Mask & Goggles

The door card in its original state, you will neer to remove all handles, bezels, etc.


Framework was cut out of MDF, attached at first using a hot glue gun (the triangular shape is for the crossover). Then once everything was in the correct place Fibreglass filler was applied for a more permanent hold.


I then cut my material roughly to shape (slightly larger, as it can be trimmed afterwards). This was then stretched to shape and attached using the staple gun (you can see from the staples in the pics).
Next job is to apply the resin, you will need to do this in a well ventilated area and be wearing a mask. If you have a quick dry catalyst allow at least 45mins before applying 2nd coat (maybe even a 3rd). If you live in the UK and use ebay I can highly recommend 2343nick's shop and website tomps.com for fast, helpful service.

Once this has completely hardened use the pliers to remove the staples. At this point you can also cut out any parts you need to remove, such as the handle hole and speaker area (and in this case where the crossover fits).


Then comes the tedious job of sanding everything down and smoothing to shape using the body filler, this will take many hours.

Try masking and spraying with primer, you may be able notice any blemishes, etc, that need further filling/sanding.

Once this is all done, mask (if you haven't already) and spray the colour you require. I personally wasn't happy with the finish I had afterwards so I took it to a local bodyshop to be sprayed.


Here is the door after being at the bodyshop (see it's always best to let the professionals do it!). It was done by the lads at Devilsride and these pictures really don't do this finish justice. It has high gloss flip-coat colour to it (sort of silver/green), which is going to be the final colour of the car.
Innovation
The list of what is expected to be installed into my car:
Computer Installation
Build for Mac Mini to be able to insert and extract with ease, as I use this on a daily basis at work and home. This will be based on the centre arm rest.
Touch Screen installed into center bezel/console, instead of head unit.
Software menu system for touch screen, to incorporate: music, pictures, films/dvd, phone, gps, etc. (have already been working with the i3team on the front end for this).
Carnetix P1900 power unit.
Custom iPod Dock with extra USB port for other devices (digital camera).
iFrog Pad - Bluetooth keyboard.
USB GPS device.
Possibly a Griffin PowerMate controller.
Interior
Colour coded interior to match the exterior colour (to be) & lighting.
Custom Door builds to incorporate component speakers, crossovers and tweeters.
Custom Mac Mini installation/build.
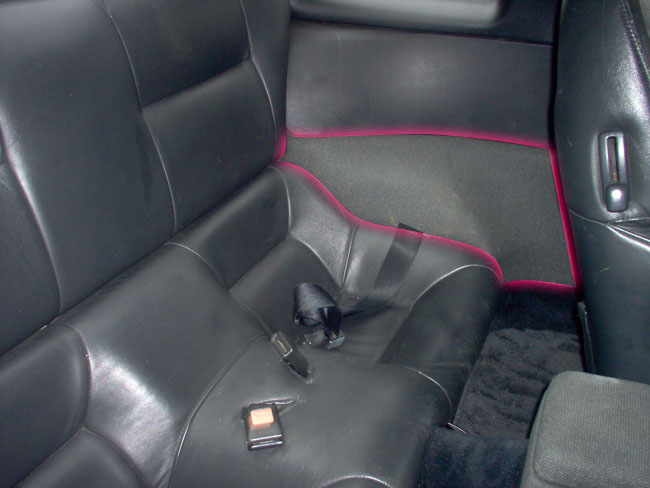
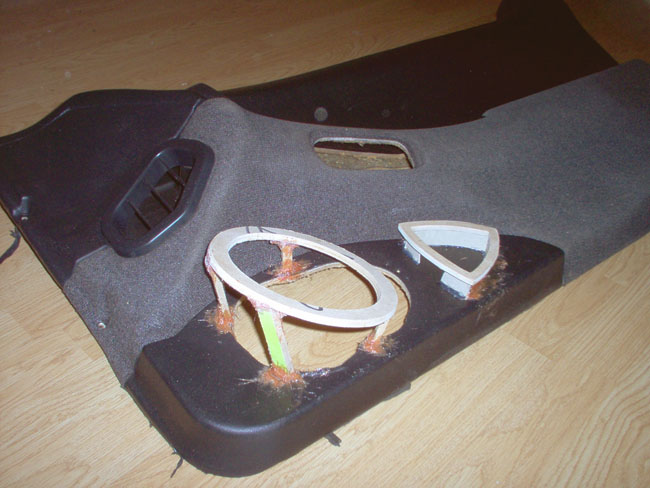
Rear seat speaker builds.
Boot build for subwoofers & amps, etc.
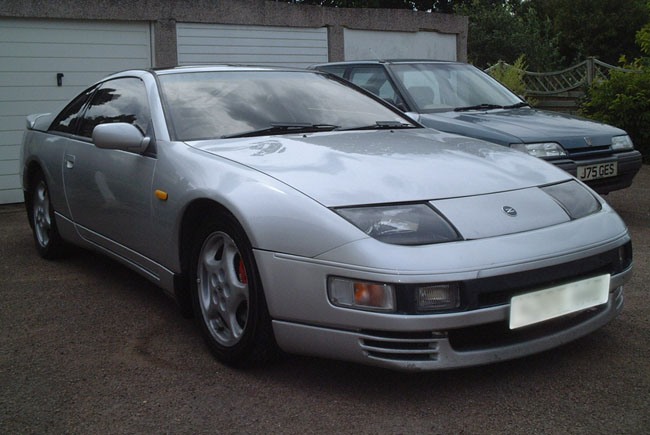
[edit 19.02.2006: Change of plans, the interior will stay the chosen colour. But for the exterior I'm going to the Darkside, it will now be a Candy Black. This is a kind of Chrome Black which is highly reflective]
Exterior
Change of Colour.
New Front Bumper (more agressive style).
Veilside Rear Bumper & Side Skirts.
Veilside 17" 3 piece split rims.
Change of bonnet.
Under lighting.
Maybe custom graphics, who knows.
Wishlist: Lambo Doors (well we all have our dreams!)
Audio
Doors : Rockford Fosgate P162S 6.5" component set.
Rear Seat : Rockford Fosgate T162C 6.5" coaxials.
Boot Build : Rockford Fosgate 2x P210S4 subwoofers, Rockford Fosgate Amp (haven't decided which yet, probably down to budget when we get there), Rockford Fosgate Power Cap, 2nd Battery & split charge system.
[edit 19.02.2006: Thinking of having 4x Rockford Fosgate P28S4 8" Subs hidden behind the rear seat]
[edit 23.02.2006: Due to expert advice, now replacing the 10's with 8's. So it'll now be - 6x Rockford Fosgate P28S4 8" Subs (prob 2 to be hidden behind the rear seat)]
There that's about it (whew!), if there are any changes I'll update the list when possible.
Now imagine all that lot in there (look down).
In the beginning . . . .
Say hello to my pride and joy, a 1991 300zx Twin Turbo (Jap Import)


This blog is here to show the progress of my project (the highs & the lows), including how to's for creating all the custom made builds for: interior, audio and carputer installs (for those of you who are interested).
As of time of publishing this blog I have already begun, things started back in Sept 2005. So I will start by showing the parts already created, along with details of what is planned for the future.